

Last updated: October 2, 2026
Quick answer: Calibrating a Hall effect keyboard maps rest and bottom-out magnetic flux voltages for every switch to establish accurate travel baselines. Calibration prevents phantom inputs and restores sub-millimeter Rapid Trigger tracking across all magnetic keys.
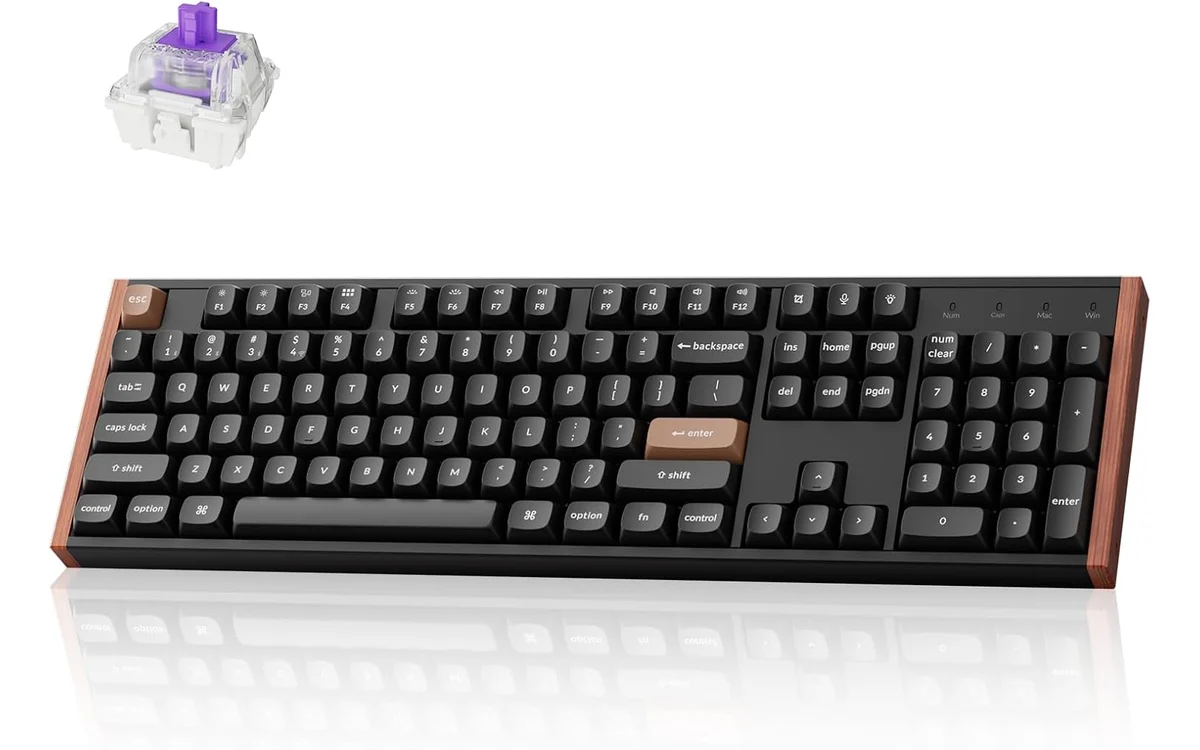
Learning how to calibrate a Hall effect keyboard ensures precise input tracking across modern magnetic switch gaming boards in Keyboards. As of October 2026, magnetic switches dominate competitive gaming setups, but physical switch swaps, magnetic field drift, thermal fluctuations, and structural plate flex require recalibration to avoid missed keystrokes or stuck inputs.
What Is How To Calibrate A Hall Effect Keyboard?
Hall effect keyboard calibration measures the lowest and highest magnetic flux points for switch sensors across a printed circuit board (PCB). Standard mechanical switches rely on physical metal leaf contacts to complete an electrical circuit. Magnetic switches use permanent neodymium magnets inside sliding switch stems and surface-mount Hall effect sensors on the PCB below.
A Hall sensor outputs variable analog voltage proportional to magnetic flux density. Calibration registers the baseline resting voltage when the switch spring pushes the stem to top dead center, then registers the maximum displacement voltage when the stem bottoms out against the switch housing. The onboard microcontroller (MCU) maps intermediate travel values between zero and four millimeters across an analog-to-digital converter (ADC) grid.
Why How To Calibrate A Hall Effect Keyboard Matters
Precise calibration dictates competitive gaming performance. In fast-paced tactical shooters, players rely on Rapid Trigger to reset keystrokes the moment finger pressure eases upward by 0.1mm. If a sensor lacks accurate top or bottom travel limits, the MCU miscalculates reset thresholds, resulting in dead movement stops or missed counter-strafes.
Calibration directly eliminates ghost inputs and phantom actuation. Mechanical tolerances vary between switch batches. Magnet strength differs by fractions of a millitesla. Spring compression rates shift over millions of actuations. Calibrating compensates for manufacturing deviations across all 61 to 104 individual keys, normalizing sensitivity across the entire layout.
Calibration preserves hardware longevity and upgrade paths. Swapping switch types, lubricating stems, or opening the case alters internal spacing. Magnetic field changes alter base voltage. Recalibrating lets users replace switches without buying replacement boards. Readers exploring switch designs can compare operational differences in our guide on hall effect vs optical keyboards.
How How To Calibrate A Hall Effect Keyboard Works
Calibration aligns sensor hardware with keyboard firmware logic. Magnetic sensors register continuous magnetic flux density, but firmware requires discrete reference points to translate voltage into millimeter travel distances.
Sensor Magnet Dynamics and Analog Voltage Mapping
A Hall effect sensor operates via the Lorentz force. Electric current flows through a thin semiconductor plate inside the PCB sensor package. When a magnet embedded in the key stem approaches the sensor, the magnetic field deflects charge carriers to the semiconductor edges. Deflection generates a measurable transverse voltage called Hall voltage.
The onboard ADC translates Hall voltage into digital values ranging from 0 to 255 (8-bit) or 0 to 4095 (12-bit resolution). Because magnetic field strength drops non-linearly with distance according to inverse-square laws, the keyboard MCU uses calibration lookup tables to linearize output. Accurate calibration establishes precise endpoints so mathematical linearization models map physical stem distance correctly.
Step-by-Step Manual and Web-Configurator Calibration Process
Calibration processes vary by manufacturer software, but the fundamental operational sequences follow identical technical requirements:
Step 1: Open the keyboard web configurator or proprietary desktop software using Google Chrome, Microsoft Edge, or vendor driver utilities supporting WebHID protocols.
Step 2: Enter the device settings menu and select switch calibration mode. The keyboard enters a state where active keystrokes do not send standard USB HID keycodes to the operating system.
Step 3: Keep hands off the keyboard surface for three seconds while the firmware captures the base resting voltage for all switches simultaneously. The capture establishes top dead center.
Step 4: Press every key firmly down until the stem hits the bottom switch housing. Depress each key straight down without aggressive lateral stem twisting. The microcontroller records the peak magnetic flux saturation point.
Step 5: Release the keys completely. Confirm the visual software display shows 0.0mm rest and maximum travel (typically 3.8mm to 4.0mm) for each key switch.
Step 6: Save the calibration data to the internal keyboard flash memory (onboard EEPROM). Disconnect and reconnect the USB cable to verify stability.
Rapid Trigger and Dynamic Actuation Tuning
After physical calibration sets zero and bottom limits, dynamic actuation algorithms activate. The actuation point sets the required travel depth before a key sends an input signal. Rapid Trigger enables dynamic resets: the key deactivates the moment the stem moves upward by the configured sensitivity value (such as 0.15mm), regardless of where the key sits in its travel range.
Without baseline calibration, Rapid Trigger fails. If the sensor believes a key sits at 2.1mm when the physical stem rests at 1.8mm, subtle vibrations or finger weight trigger inadvertent continuous inputs. Correct calibration creates clean buffer zones at the top (dead zone top) and bottom (dead zone bottom) to isolate analog noise from genuine keypresses.
What to Look For When Buying
When selecting magnetic switch hardware in our best gaming keyboards category, evaluate specific firmware and hardware calibration features:
- WebHID Driver Support: Prefer keyboards supporting browser-based calibration utilities over bulky background services that drain system resources.
- Onboard Memory Storage: Ensure calibration data and actuation curves are stored directly on the keyboard MCU so settings persist across operating systems without software running.
- Configurable Dead Zones: Look for boards allowing manual top dead zone (0.1mm – 0.3mm) and bottom dead zone adjustments to eliminate magnetic noise.
- ADC Bit Depth: 12-bit ADC controllers provide finer travel resolution and tighter 0.1mm Rapid Trigger tracking than legacy 8-bit controllers.
- Automatic Drift Compensation: Modern firmware includes automatic thermal recalibration algorithms that adjust resting baselines as ambient room temperatures change.
- Switch Compatibility: Ensure the board uses standard magnetic switch footprints if you plan to swap switches. Enthusiasts building compact desks can review models in our best 60 percent hall effect keyboard under $80 guide.
Common Mistakes to Avoid
- Pressing Keys During the Initial Baseline Scan: Touching keycaps while the firmware measures the initial rest voltage corrupts the zero point, causing keys to actuate without physical contact.
- Tilting Stems During Bottom-Out Calibration: Pushing switch stems sideways alters the magnet distance relative to the PCB sensor, leading to incorrect bottom-out measurements. Press straight down.
- Ignoring Temperature Changes: Bringing a cold keyboard into a warm room causes magnetic flux expansion and plate contraction. Always allow the keyboard to reach room temperature before calibrating.
- Setting Zero Dead Zones: Setting the top dead zone to absolute zero makes the keyboard vulnerable to resting finger weight or desk or table bumps. Maintain a 0.15mm to 0.2mm top dead zone.
- Interchanging Incompatible Magnetic Switches: Inserting dual-rail magnetic switches into single-rail sockets or using reverse polarity magnets causes erratic calibration errors or dead keys.
Quick Comparison
| Term | What It Means | Why It Matters | Who Should Care |
|---|---|---|---|
| Top Dead Center | Switch resting position against upper housing | Determines zero travel baseline for analog calculations | All Hall effect keyboard users |
| Bottom Dead Center | Switch fully compressed against bottom housing | Defines maximum travel depth (usually 3.8mm – 4.0mm) | Competitive gamers, typists |
| Rapid Trigger | Dynamic actuation reset based on upward stem motion | Enables immediate keystroke resets without crossing fixed point | FPS and rhythm game players |
| Dead Zone | Travel threshold where input signals are ignored | Filters analog signal noise, prevents phantom keypresses | Low-actuation speed typists |
| WebHID Calibration | Browser-based firmware parameter adjustment | Eliminates need for heavy manufacturer software suites | Linux, macOS, and clean-install PC users |
Related Guides
- Hall effect vs optical keyboards
- Best 60 percent hall effect keyboard under $80
- Best One-Handed hall effect keyboards under $50
- Best Hot-swappable keyboard with wireless connectivity
Why You Should Trust PCGearWiki
PCGearWiki provides clear, hardware-focused technical analysis built on architectural specifications, microcontroller documentation, and manufacturer switch datasheets. We avoid promotional jargon and marketing claims, focusing strictly on engineering realities, latency impacts, firmware capabilities, and verified compatibility standards. Read our complete research and review standards at How We Evaluate Products.
Final Thoughts
Calibrating a Hall effect keyboard is essential routine maintenance whenever you modify switches, update firmware, or encounter input stutter. Establishing precise resting and bottom-out travel thresholds allows internal microcontrollers to accurately calculate analog positions, guaranteeing reliable Rapid Trigger response and eliminating phantom keystrokes during intensive gaming sessions.
Frequently Asked Questions
How often should I calibrate my Hall effect keyboard?
Calibrate your Hall effect keyboard whenever you swap key switches, update keyboard firmware, change keycaps, or experience phantom inputs. Regular recalibration is otherwise unnecessary unless seasonal room temperature shifts alter resting magnetic field readings.
Why does my Hall effect keyboard type letters on its own?
Self-typing or phantom inputs happen when the switch baseline calibration drifts above the configured actuation point. Running a manual calibration restores the correct resting travel value (0.0mm), and adding a 0.2mm top dead zone prevents natural spring bounce from triggering unintended signals.
Can I swap any mechanical switch into a Hall effect keyboard?
No. Traditional mechanical switches use metal contact pins that do not work in Hall effect PCB sockets. Magnetic boards require Hall effect switches equipped with internal stem magnets, correct magnetic polarity orientation, and matching housing rails.
Does calibrating a Hall effect keyboard lower input latency?
Calibration does not change USB polling rates or processor clock speeds, but it ensures input responsiveness. By aligning physical travel with firmware detection limits, keys actuate at the precise intended millimeter mark without requiring extra bottom-out force or wasted finger travel.
Add PCGearWiki as a preferred source on Google
Sources and Verification
Research basis: Product identity, dimensions, interfaces, supported features, and warranty terms are checked against available manufacturer documentation and current retailer listings. Price, stock, and aggregate customer ratings can change after publication.
Testing disclosure: Unless this article explicitly states that PCGearWiki performed hands-on testing and describes the test setup, recommendations are research-based editorial evaluations rather than PCGearWiki laboratory measurements. Customer feedback is used to identify recurring ownership patterns, not as proof of technical performance.
Last source review: October 2, 2026. See our Review Methodology, Editorial Policy, and Corrections Policy.


Write Your Review
No reviews yet. Be the first to share your experience!